Admin Onboarding
Set up your Ollie Shop admin dashboard and configure your first store in 3 minutes. No coding required.
Transform your e-commerce checkout in minutes, not months. Configure your store through our visual dashboard - no technical setup required.
No Code Required
Visual configuration through admin dashboard. Point, click, customize.
Instant Changes
See changes immediately on your live checkout. No deployment wait times.
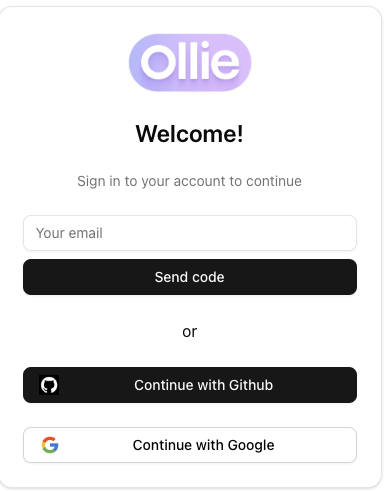
Sign In
Start by visiting admin.ollie.shop:1
Choose Authentication
- GitHub: Best for development teams
- Google: Fastest for business users
- Email: Most secure for enterprises
2
Verify Access
You’ll be redirected to the dashboard after successful authentication
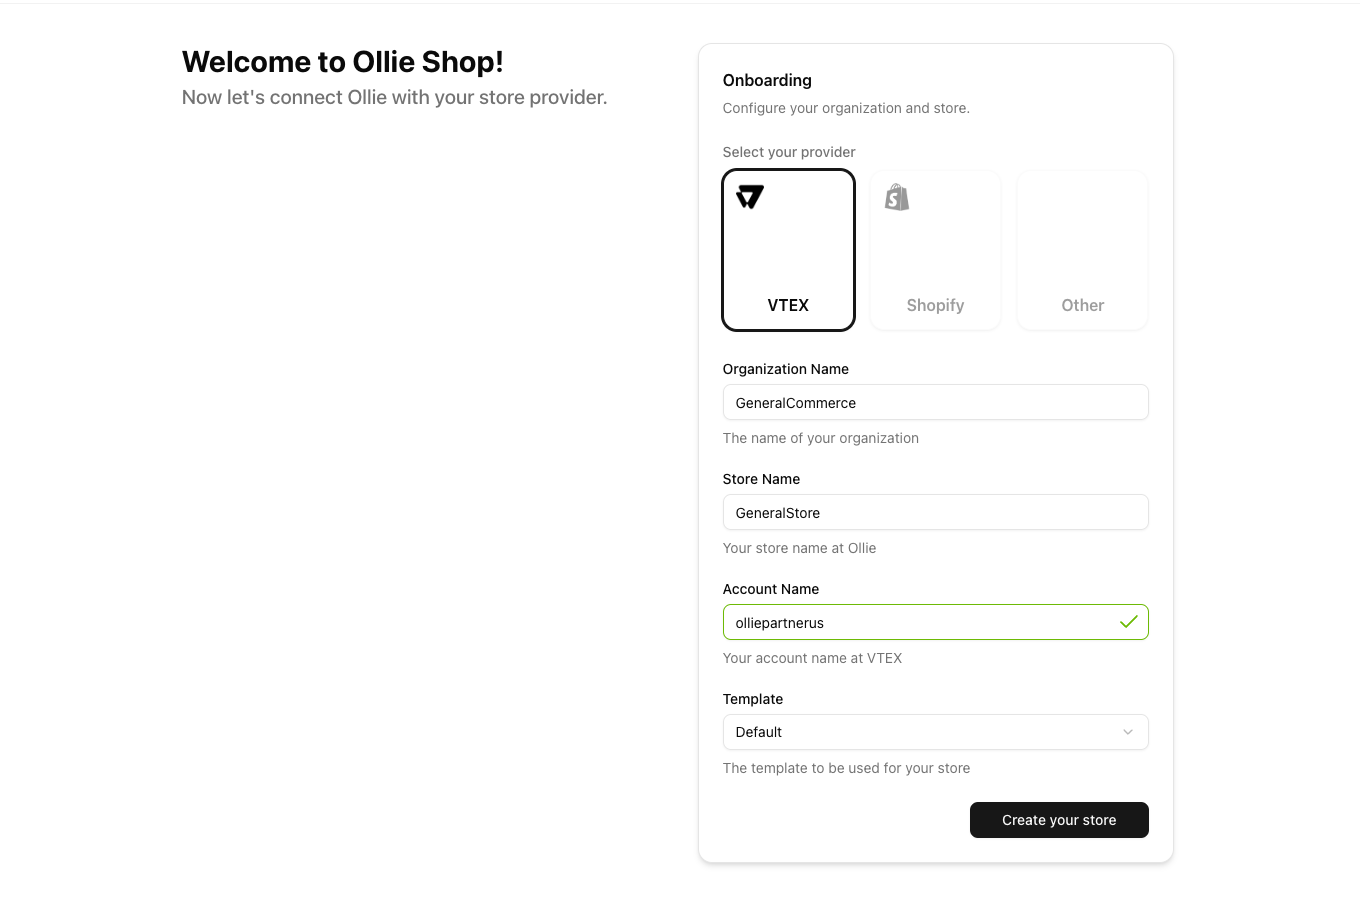
Create Your Store
Configure your e-commerce store integration:1
Select Platform
VTEX
Currently Supported - Full integration with VTEX platform
2
Organization Setup
Organization Name: Your company name (e.g., “Acme Fashion Co”)This creates your team workspace for managing multiple stores
3
Store Configuration
Store Name: Your e-commerce store name (e.g., “Main Store”)
Store URL: Your checkout domain (e.g., “acmefashion.vtexcommercestable.com.br”)
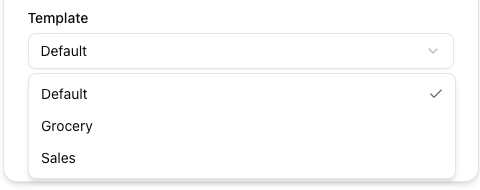
Choose Your Template
Select a checkout layout that matches your business model:Best for: General e-commerce, fashion, electronics
Layout
Multi-step checkout with cart review
Use Cases
Standard retail, B2C commerce
Template Selection: Choose carefully - templates can’t be changed after creation. You can create additional versions with different templates later.
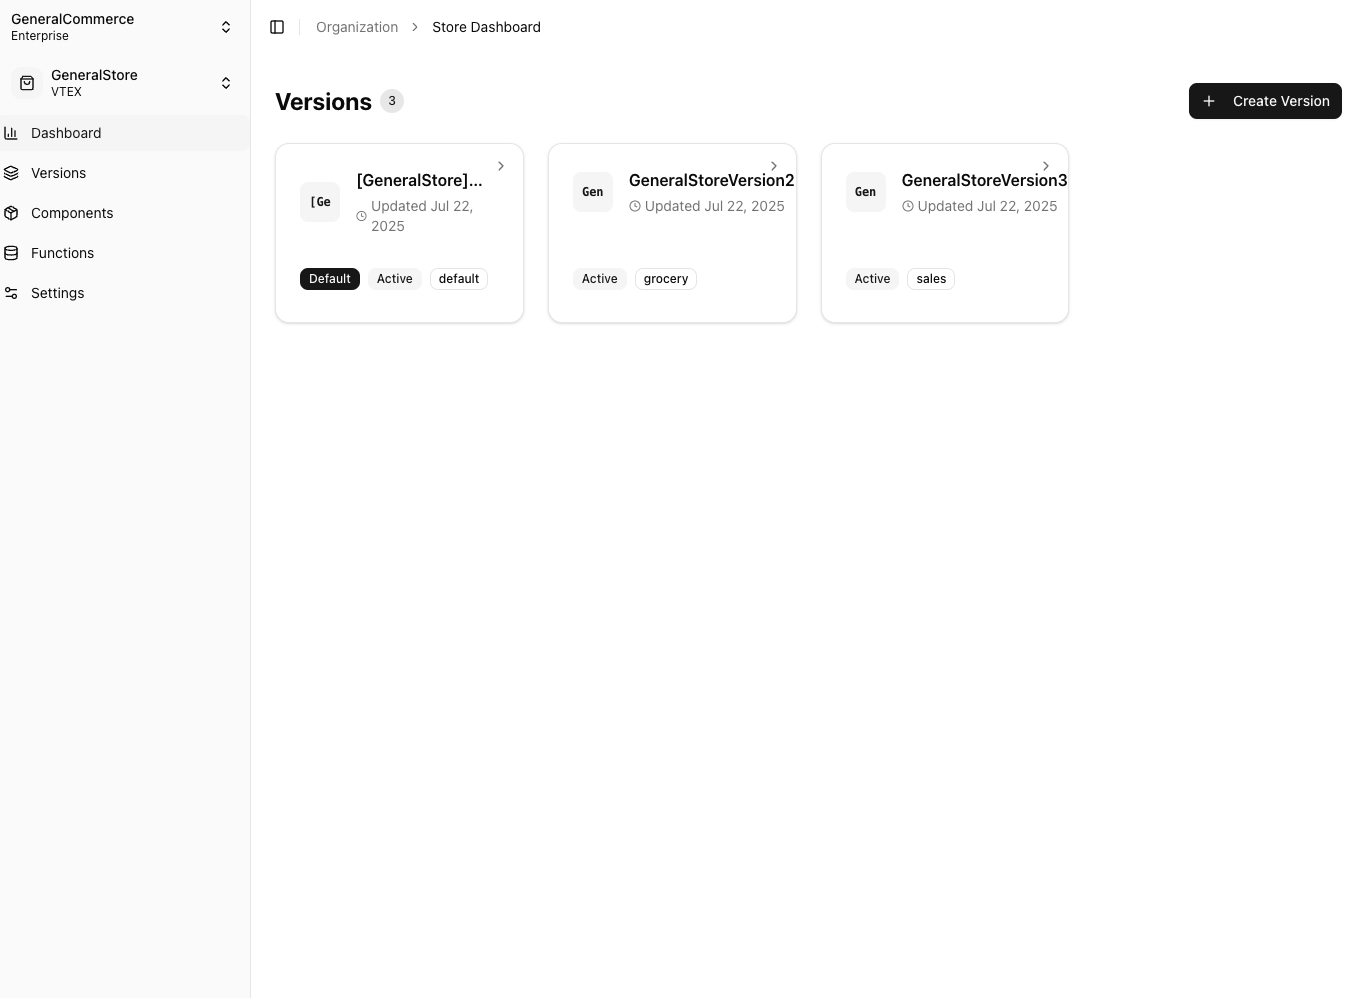
Your First Version
Your store is automatically created with a default version:Default Version
Automatically created and set as default for all traffic
Active Status
Your version is live and serving customers
Template Applied
Your chosen template is ready for customization
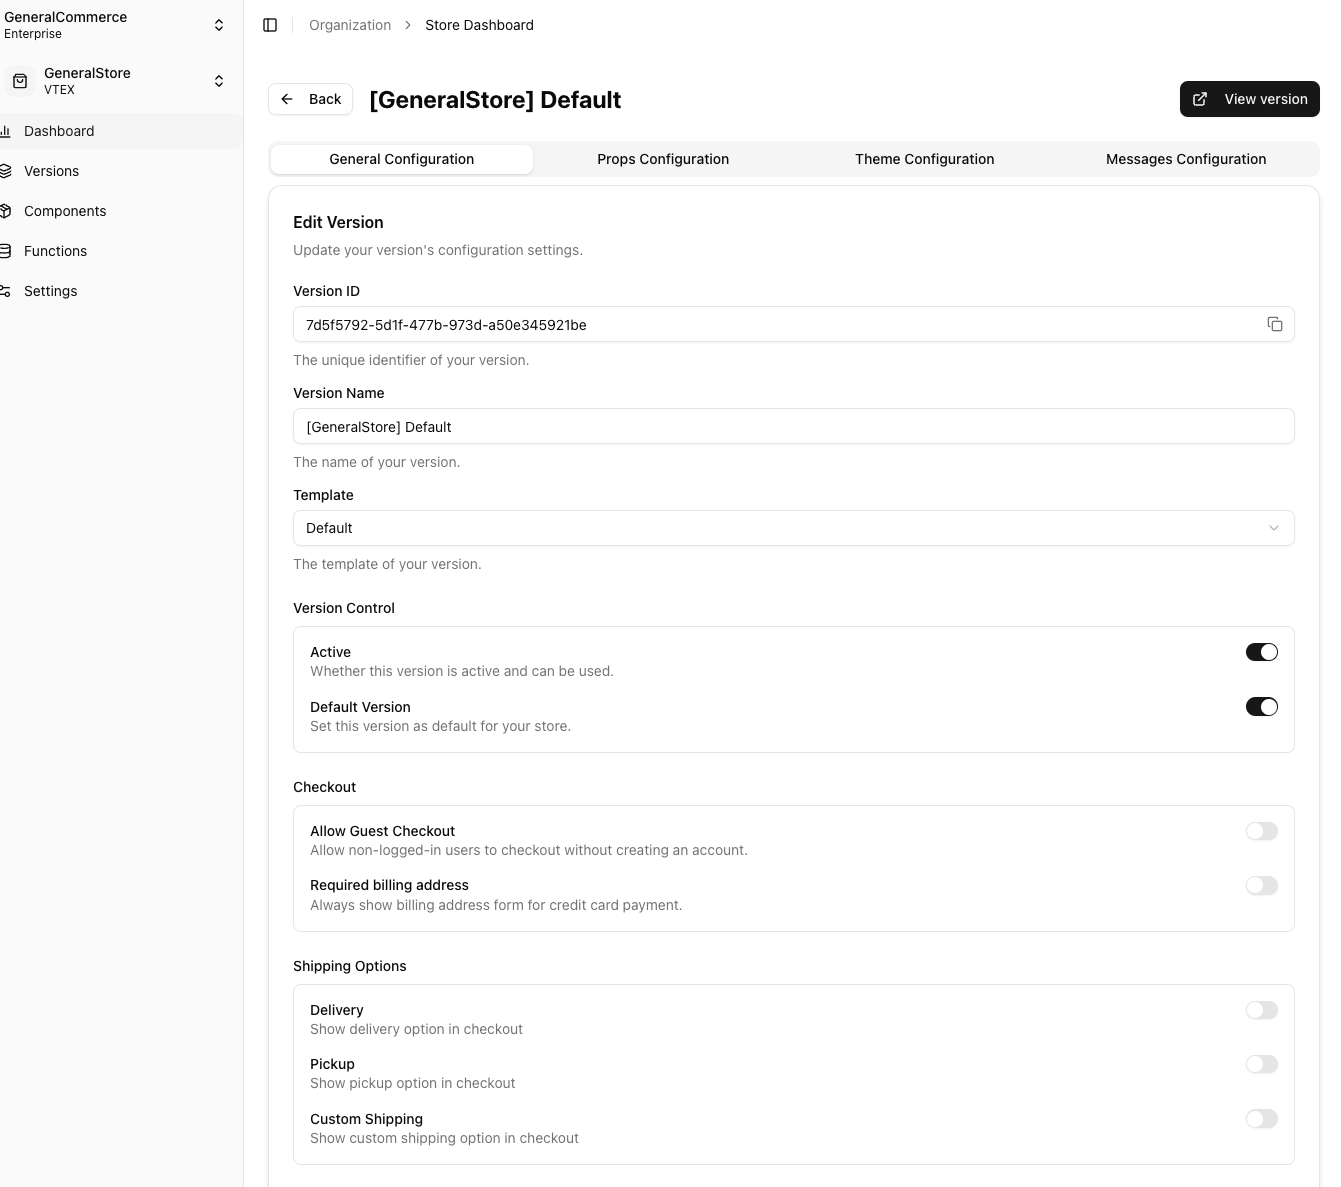
Customize Your Checkout
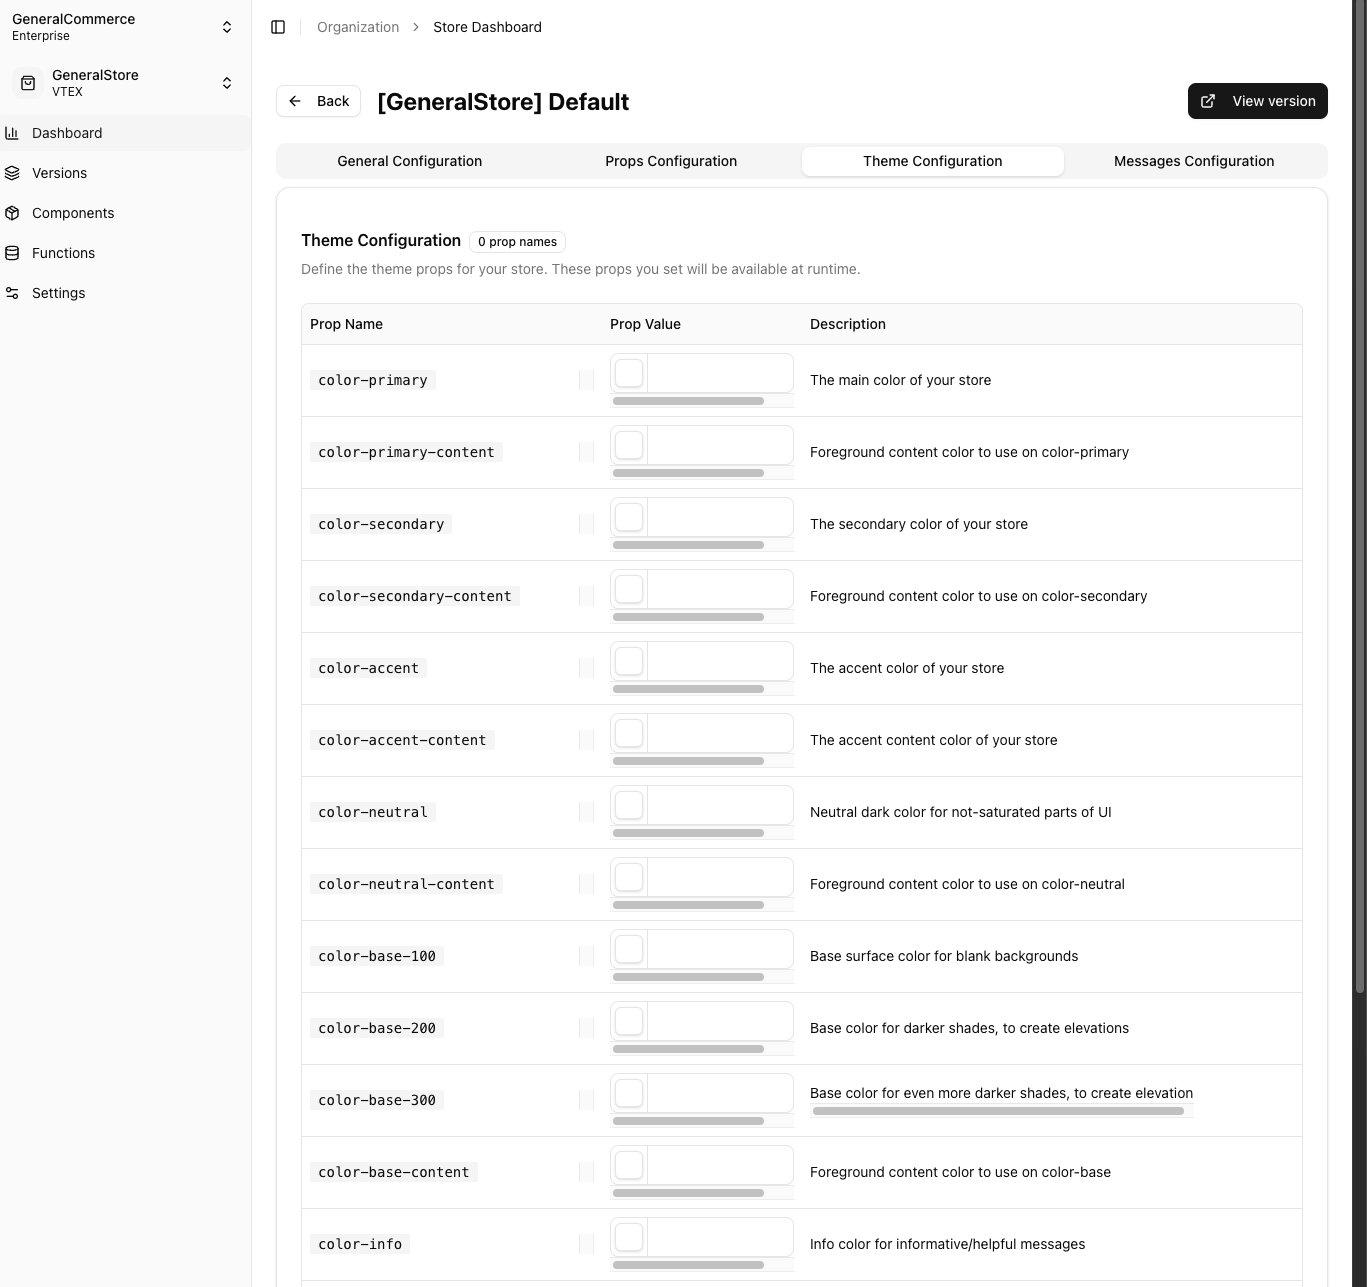
Click on your version to access the configuration dashboard:Theme Configuration
Make your checkout match your brand:Theme Options
Theme Options
Brand Colors
Primary: Main brand color for buttons and highlights
Secondary: Accent colors for links and secondary actions
Background: Page and section backgrounds
Typography
Font Family: Choose from web-safe font stacks
Font Sizes: Heading and body text sizing
Font Weights: Bold, regular, light variations
Layout Spacing
Padding: Internal spacing within components
Margins: External spacing between sections
Container Width: Maximum page width
Visual Style
Border Radius: Rounded corners for modern look
Border Width: Outline thickness for inputs/buttons
Shadow: Drop shadow for depth and elevation
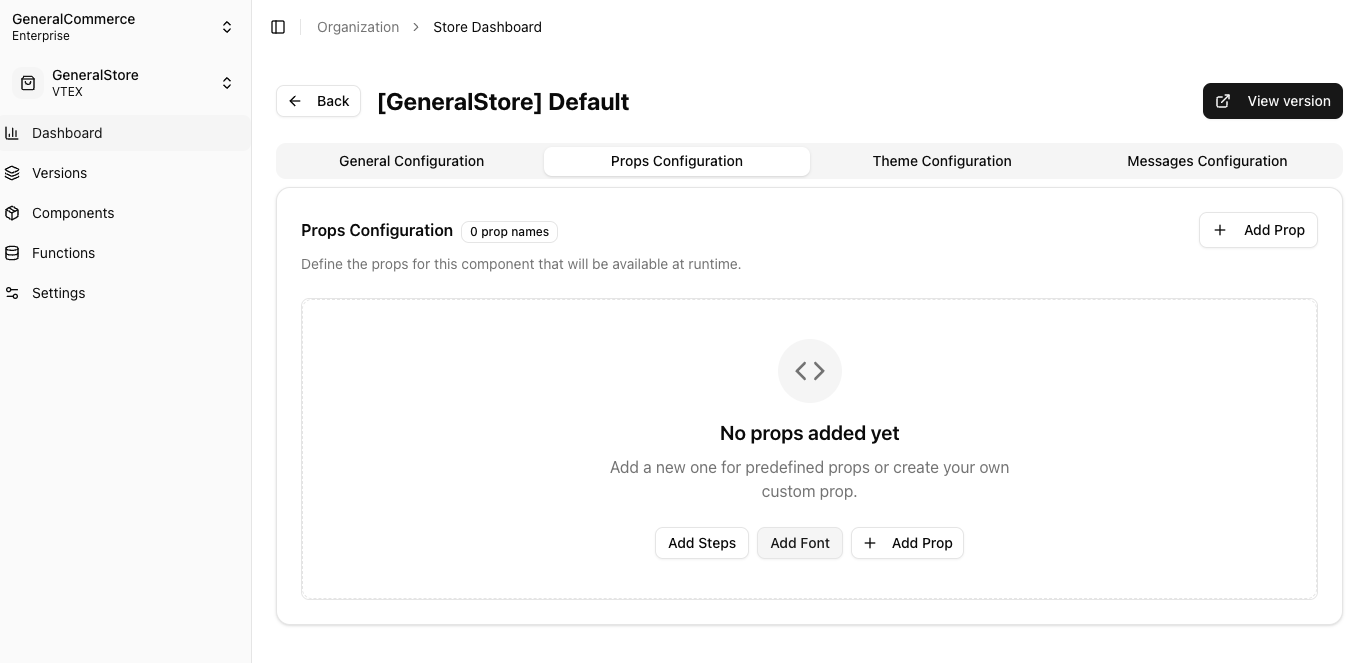
Properties Configuration
Configure checkout behavior and features:Available Properties
Available Properties
Checkout Flow
Steps: Enable/disable specific checkout steps
Progress: Show/hide progress indicator
Navigation: Allow step skipping or enforce order
Form Fields
Required Fields: Make fields mandatory
Field Validation: Set validation rules
Address: Configure address collection
Payment Options
Payment Methods: Enable specific payment types
Installments: Configure payment plans
Security: Additional verification settings
Shipping & Delivery
Delivery Options: Configure shipping methods
Pickup: Enable store pickup options
Scheduling: Delivery date/time selection
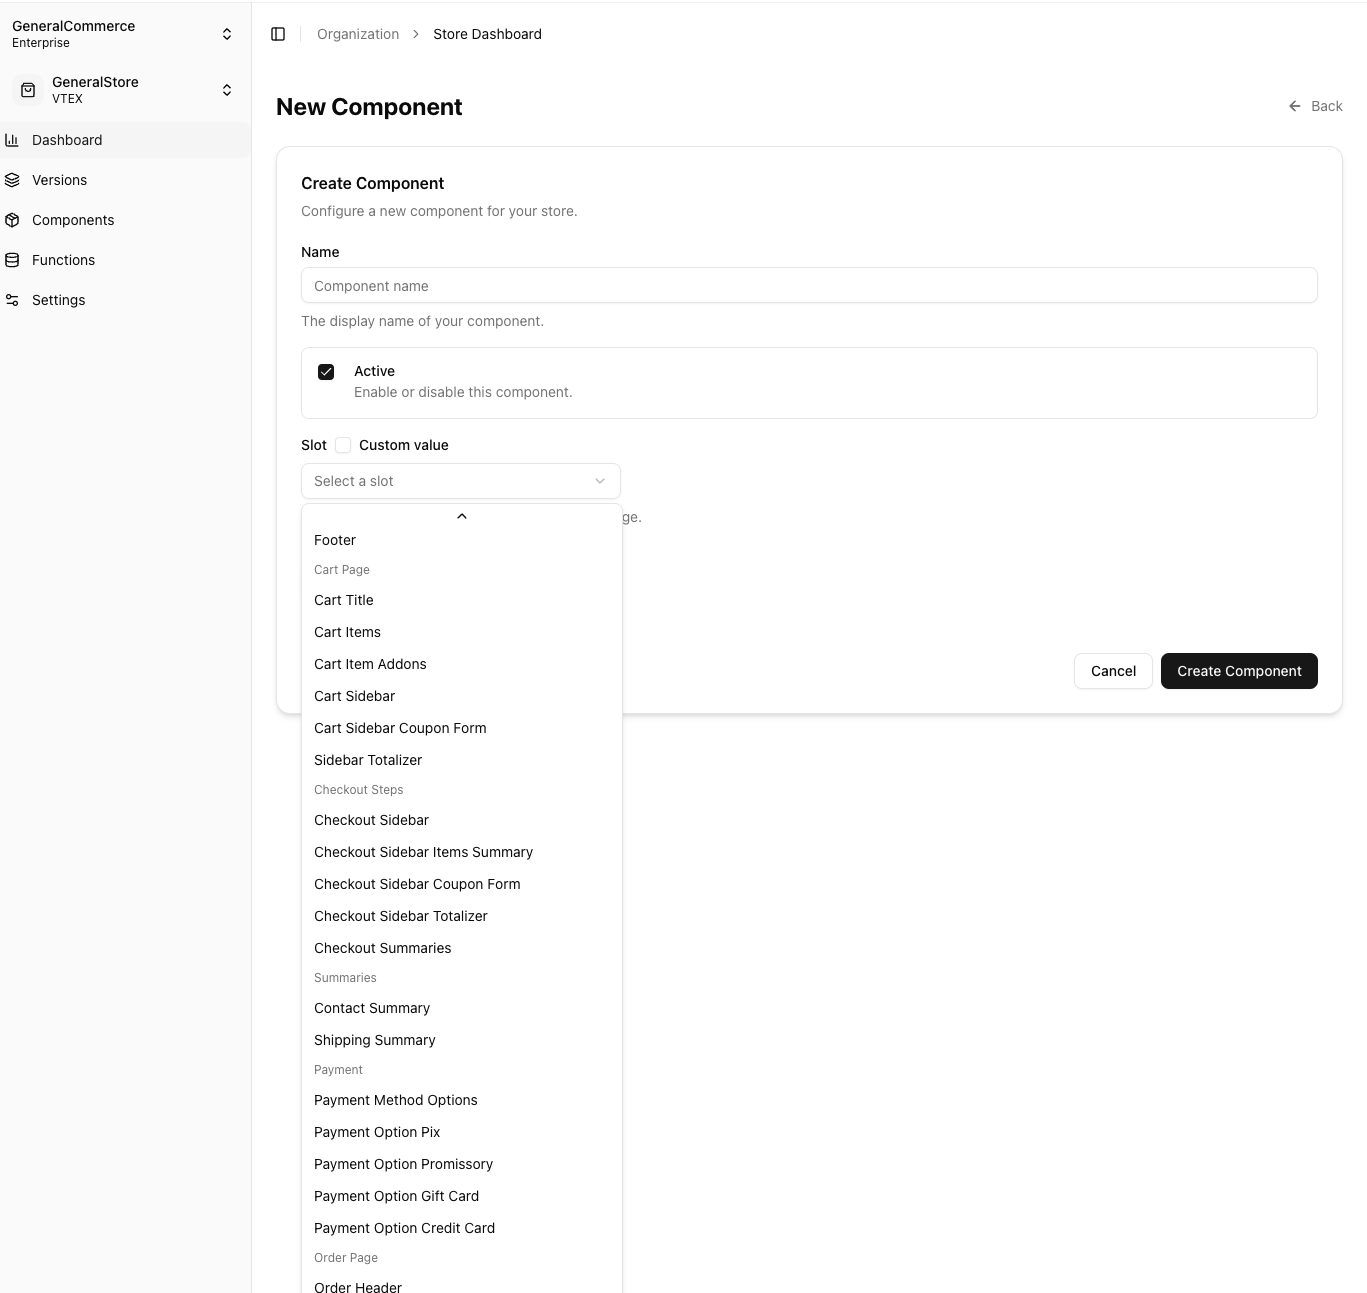
Advanced: Components (Optional)
For custom functionality, add components to specific slots:Pre-built Components
Choose from our library of ready-made components for common use cases
Custom Components
Upload your own React components for unique functionality
View Your Live Checkout
Your changes apply instantly. Visit your checkout URL to see your customization in action.Test Your Changes
- Add products to cart
- Go through checkout flow
- Test different device sizes
- Verify theme styling
Monitor Performance
- Conversion rate tracking
- User behavior analytics
- Error monitoring
- Performance metrics
Next Steps
Create More Versions
A/B test different checkout experiences
Team Management
Invite team members and manage permissions
Advanced Customization
Build custom components with our developer tools
Success! Your checkout is now customized and live. Customers will see your branded experience immediately.