> ## Documentation Index
> Fetch the complete documentation index at: https://docs.ollie.shop/llms.txt
> Use this file to discover all available pages before exploring further.
# Developer Quickstart
> Create, deploy, and see your first component live in 5 minutes
This tutorial will guide your through the necessary steps to create a new component, preview it while in development, deploy it to your store and assign it to a specific position (or slot as we call it) in your store.
## Prerequisites
```bash theme={"system"}
node --version # Should show v20.0.0 or higher
```
[Download Node.js](https://nodejs.org/) if not installed
[Download VS Code](https://code.visualstudio.com/) - Recommended editor
```bash theme={"system"}
git --version # Verify Git is installed
```
You have created a [Store](/ollie-shop/get-started/admin-onboarding) in Ollie Shop
Ollie Shop CLI requires a Unix-like environment. Windows users must use WSL (Windows Subsystem for Linux).
Open PowerShell as Administrator and run:
```powershell theme={"system"}
wsl --install
```
[Full WSL Installation Guide](https://learn.microsoft.com/en-us/windows/wsl/install)
Open WSL terminal and run:
```bash theme={"system"}
curl -fsSL https://deb.nodesource.com/setup_18.x | sudo -E bash -
sudo apt-get install -y nodejs
```
1. Install [VS Code](https://code.visualstudio.com/)
2. Install the [WSL extension](https://marketplace.visualstudio.com/items?itemName=ms-vscode-remote.remote-wsl)
3. Open WSL folders with: `code .` from WSL terminal
**All commands in this guide must be run in the WSL terminal**, not Windows Command Prompt or PowerShell.
## Step 1: Create a Hello World Component
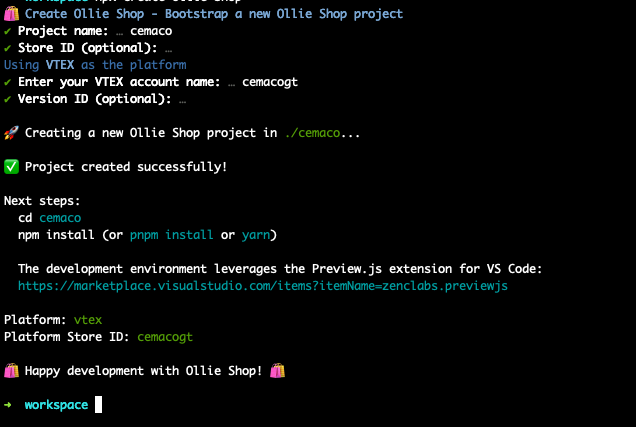
In your terminal, use the `create-ollie-shop` command to triger the scaffolding of a new project with our Hello World component.
Run the creation command
```bash theme={"system"}
npx create-ollie-shop
```
You'll be prompted for:
* `Project Name` which will be the name on the folder.
* `Store ID` leave empty - you'll be able to add this information at a later step.
* `VTEX Account Name` the id of your store in in your ecommerce provider.
* `Version ID` leave empty - you'll be able to add this information at a later step
Replace `[your-project-name]` with the name you chose
```bash theme={"system"}
cd [your-project-name]
```
## Step 2: Install Dependencies
After creating the project, set up your development environment.
```bash theme={"system"}
code . # This opens your project in VS Code
```
Developing with Ollie Shop requires Node.js and npm.
In the VS Code terminal, run:
```bash theme={"system"}
npm install
```
This installs all required packages for your project.
## Step 3: Develop Your Component
Now let's build a checkout component using the Ollie Shop SDK.
Open `components/HelloWorld/index.tsx` in VS Code.
This file contains your component code that will be deployed to your checkout.
Replace the code in the `index.tsx` file with the code below.
You'll now use the `useCheckoutSession` hook from the `@ollie-shop/sdk` package to access checkout session data.
```typescript index.tsx theme={"system"}
import { useCheckoutSession } from '@ollie-shop/sdk';
import React from 'react';
import styles from './helloWorld.module.css';
export default function HelloWorld({ name = "Stranger" }) {
const { session } = useCheckoutSession();
return (
Hello, {name}!
Session ID: {session.id}
Cart has {session.cartItems.length} items
);
}
```
Your component now accesses real checkout session data!
## Step 4: Create Component in Admin Dashboard
Before deploying, you need to register your component in the admin dashboard.
In the admin dashboard:
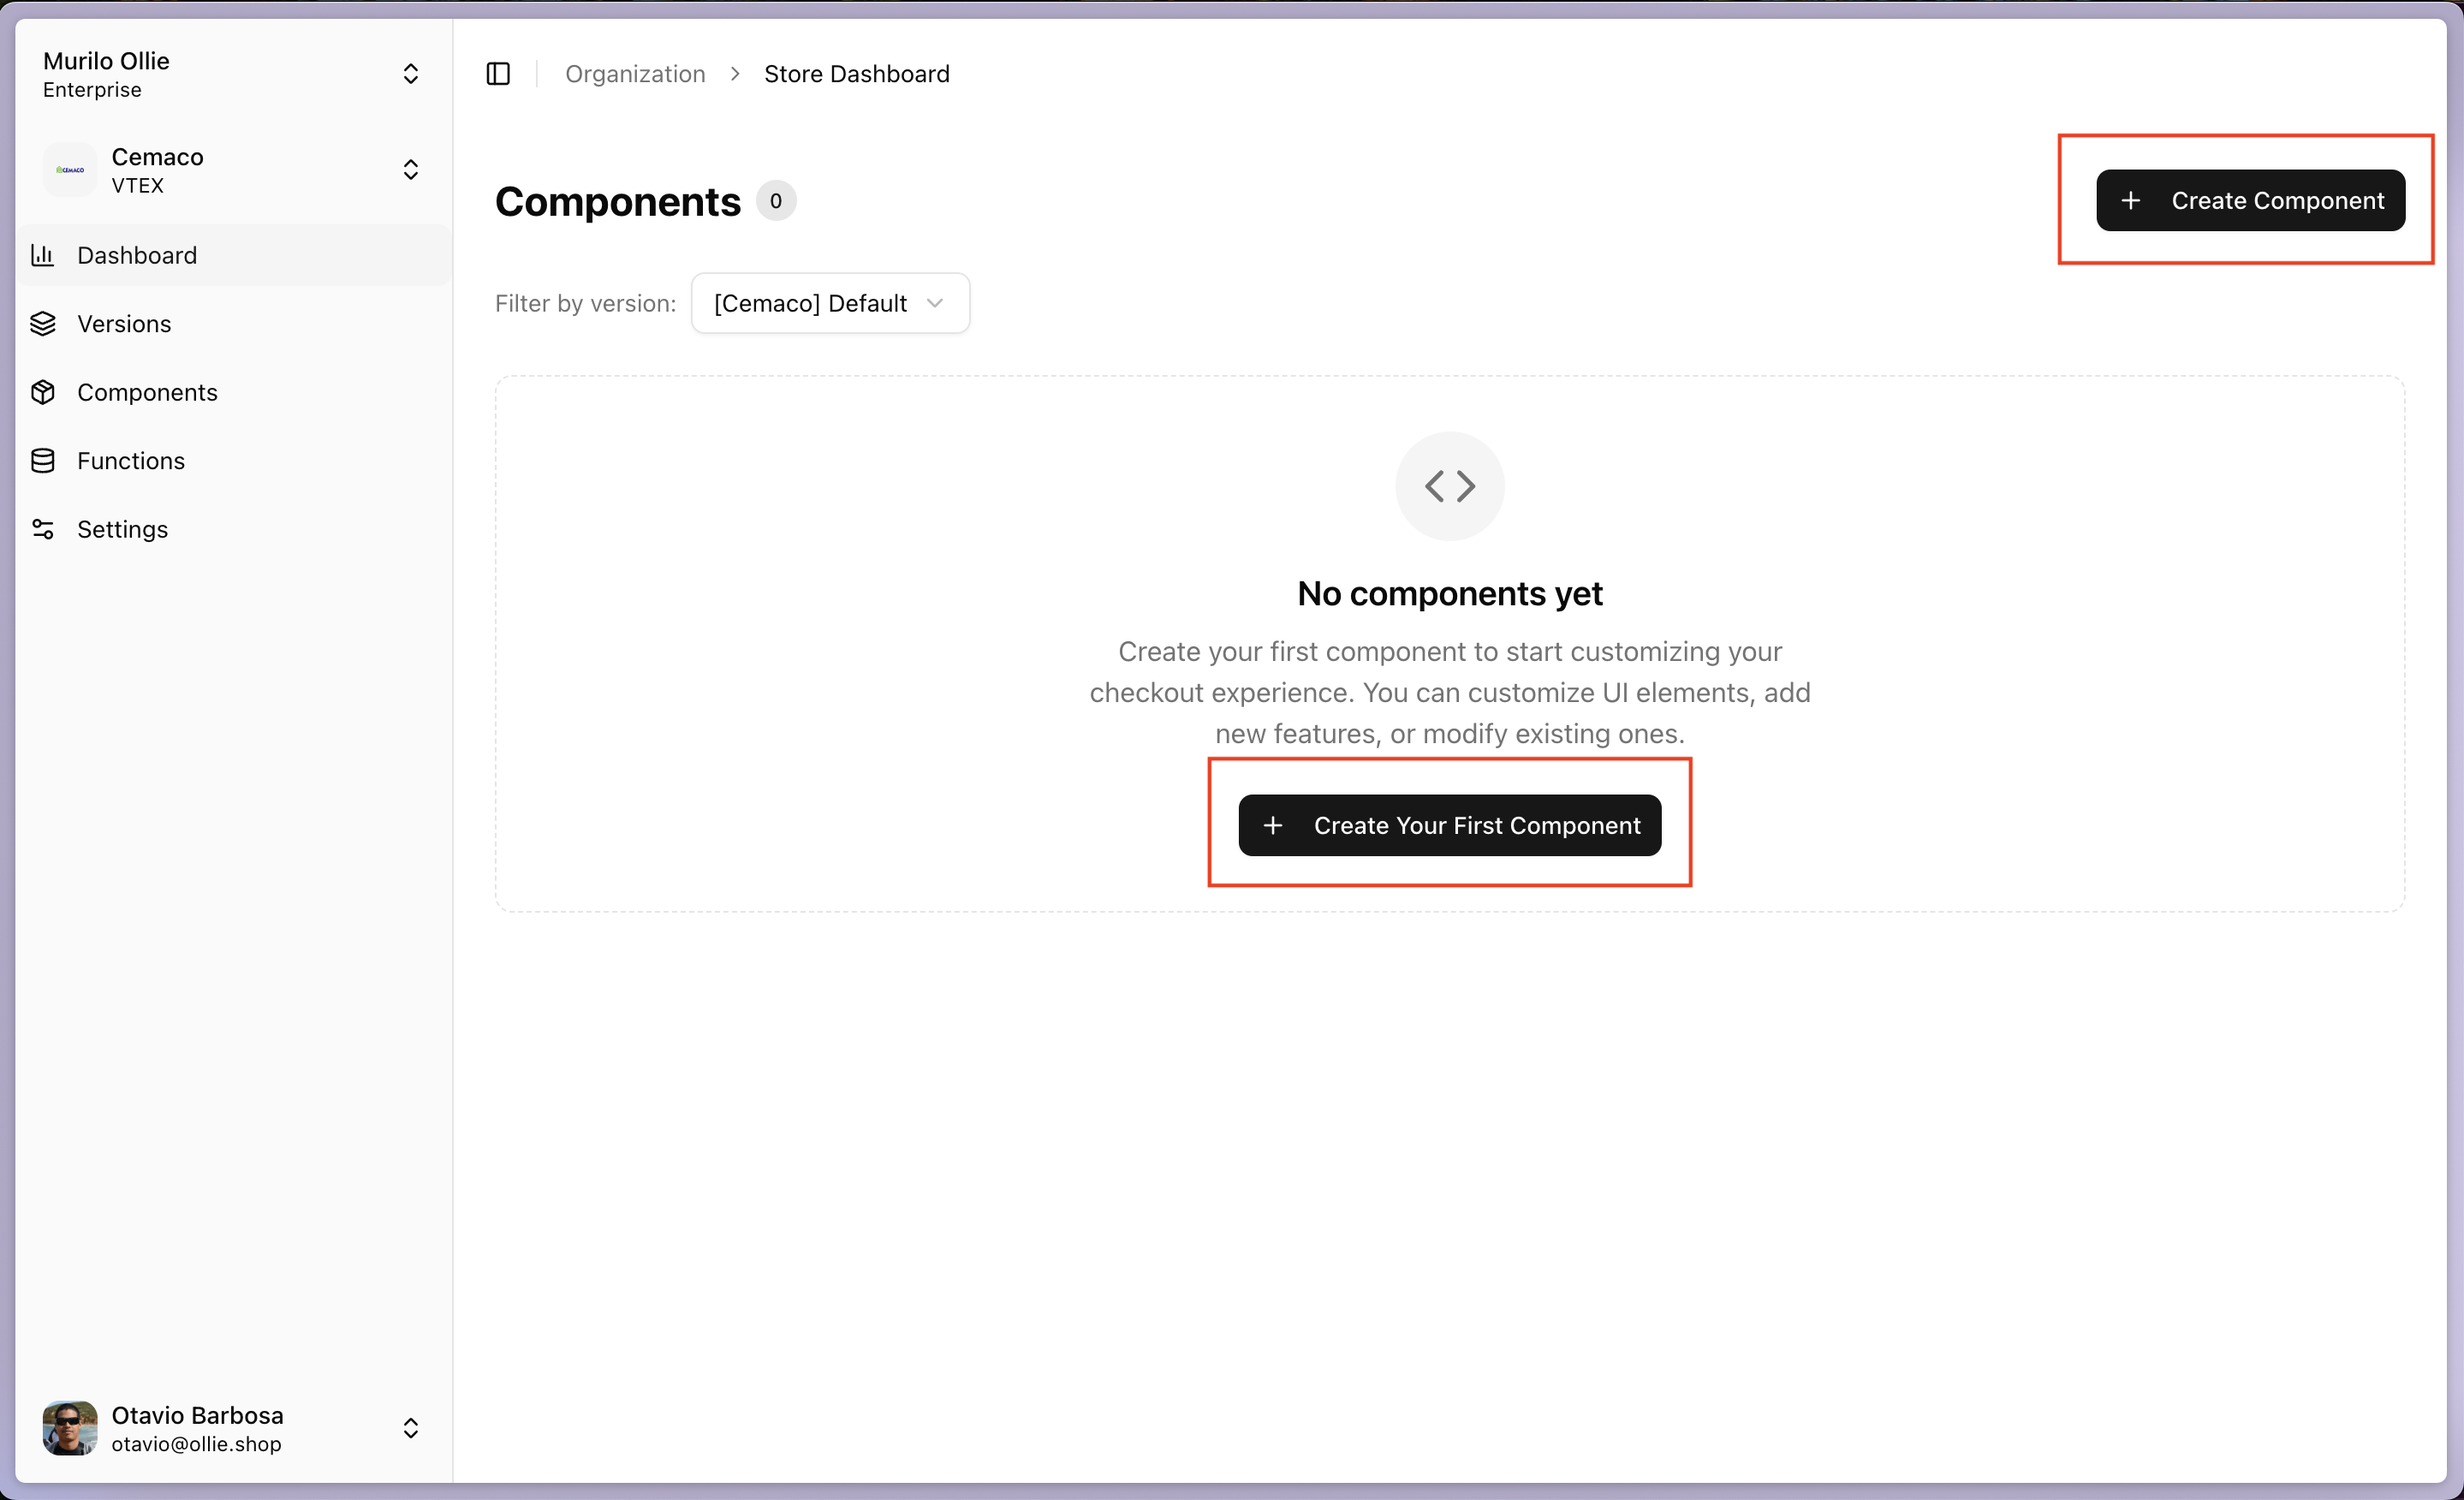
1. Click **"Components"** in the sidebar
2. Click **"Create Component"** or **"Create Your First Component"**
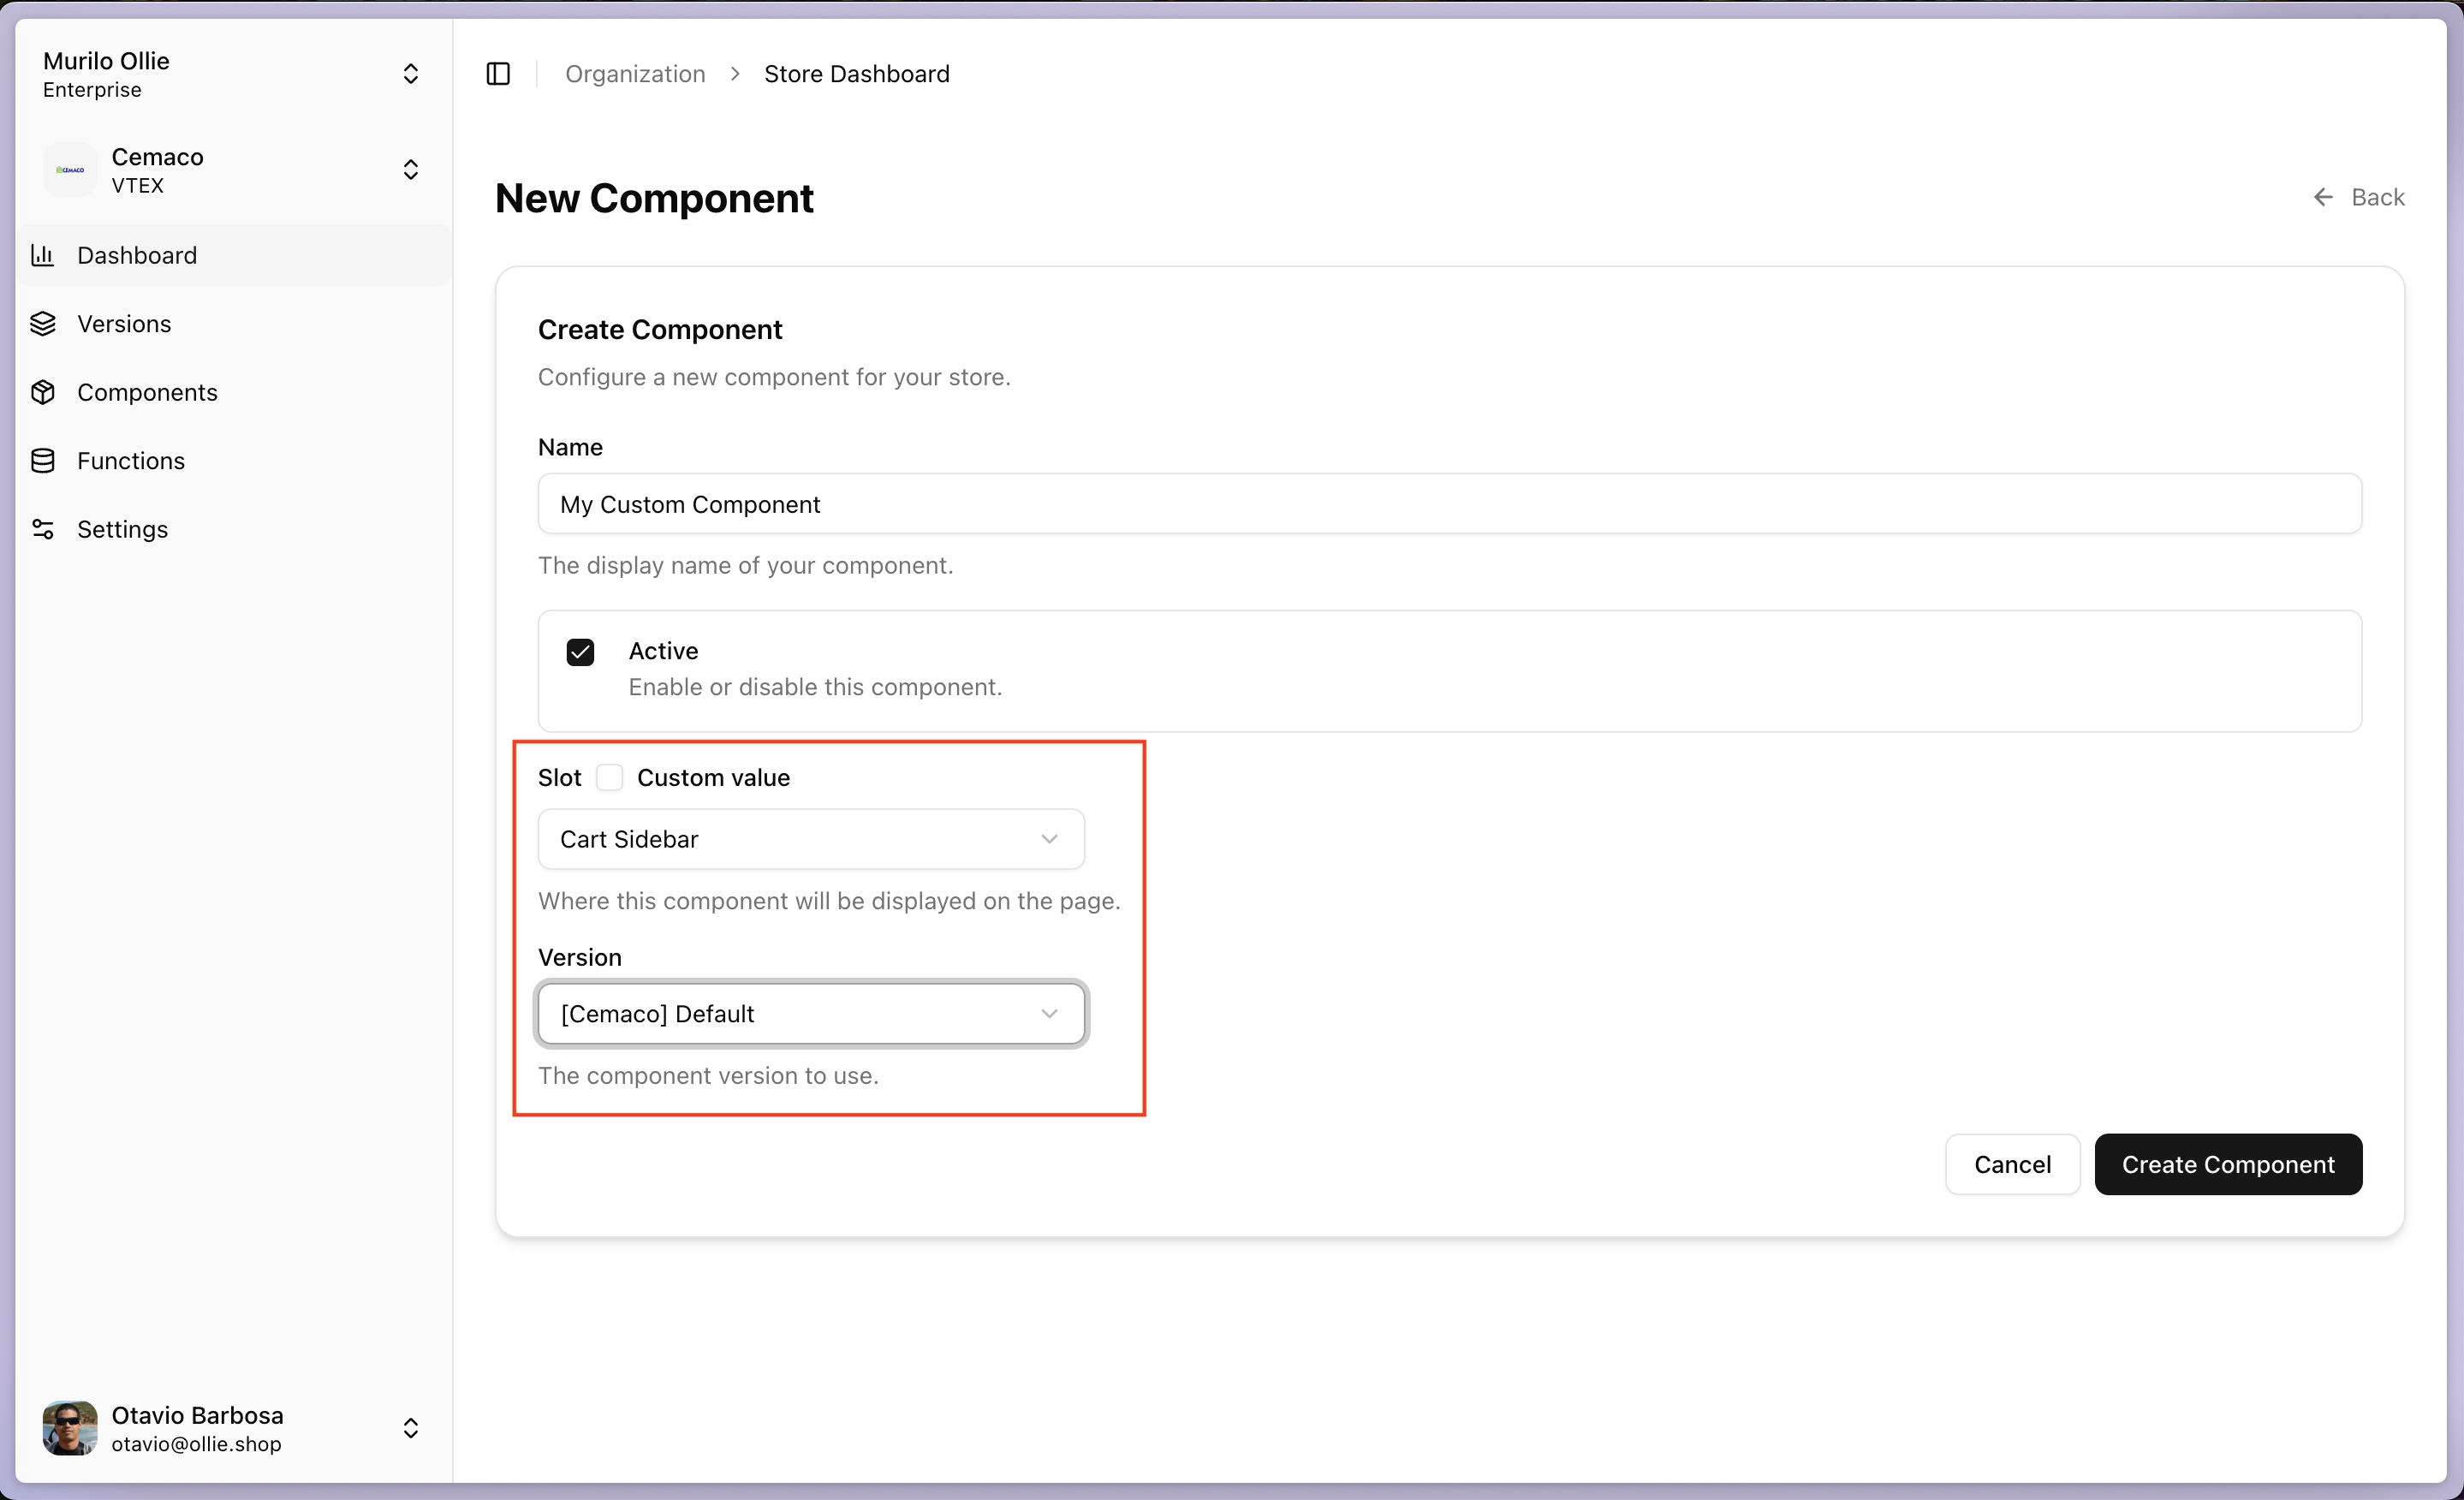
Fill in the component details:
* **Name**: Your component name (e.g., "My Custom Component")
* **Active**: Toggle ON to enable the component
* **Slot**: Select where the component appears (e.g., "Cart Sidebar")
* **Version**: Select your store version
Click **"Create Component"**
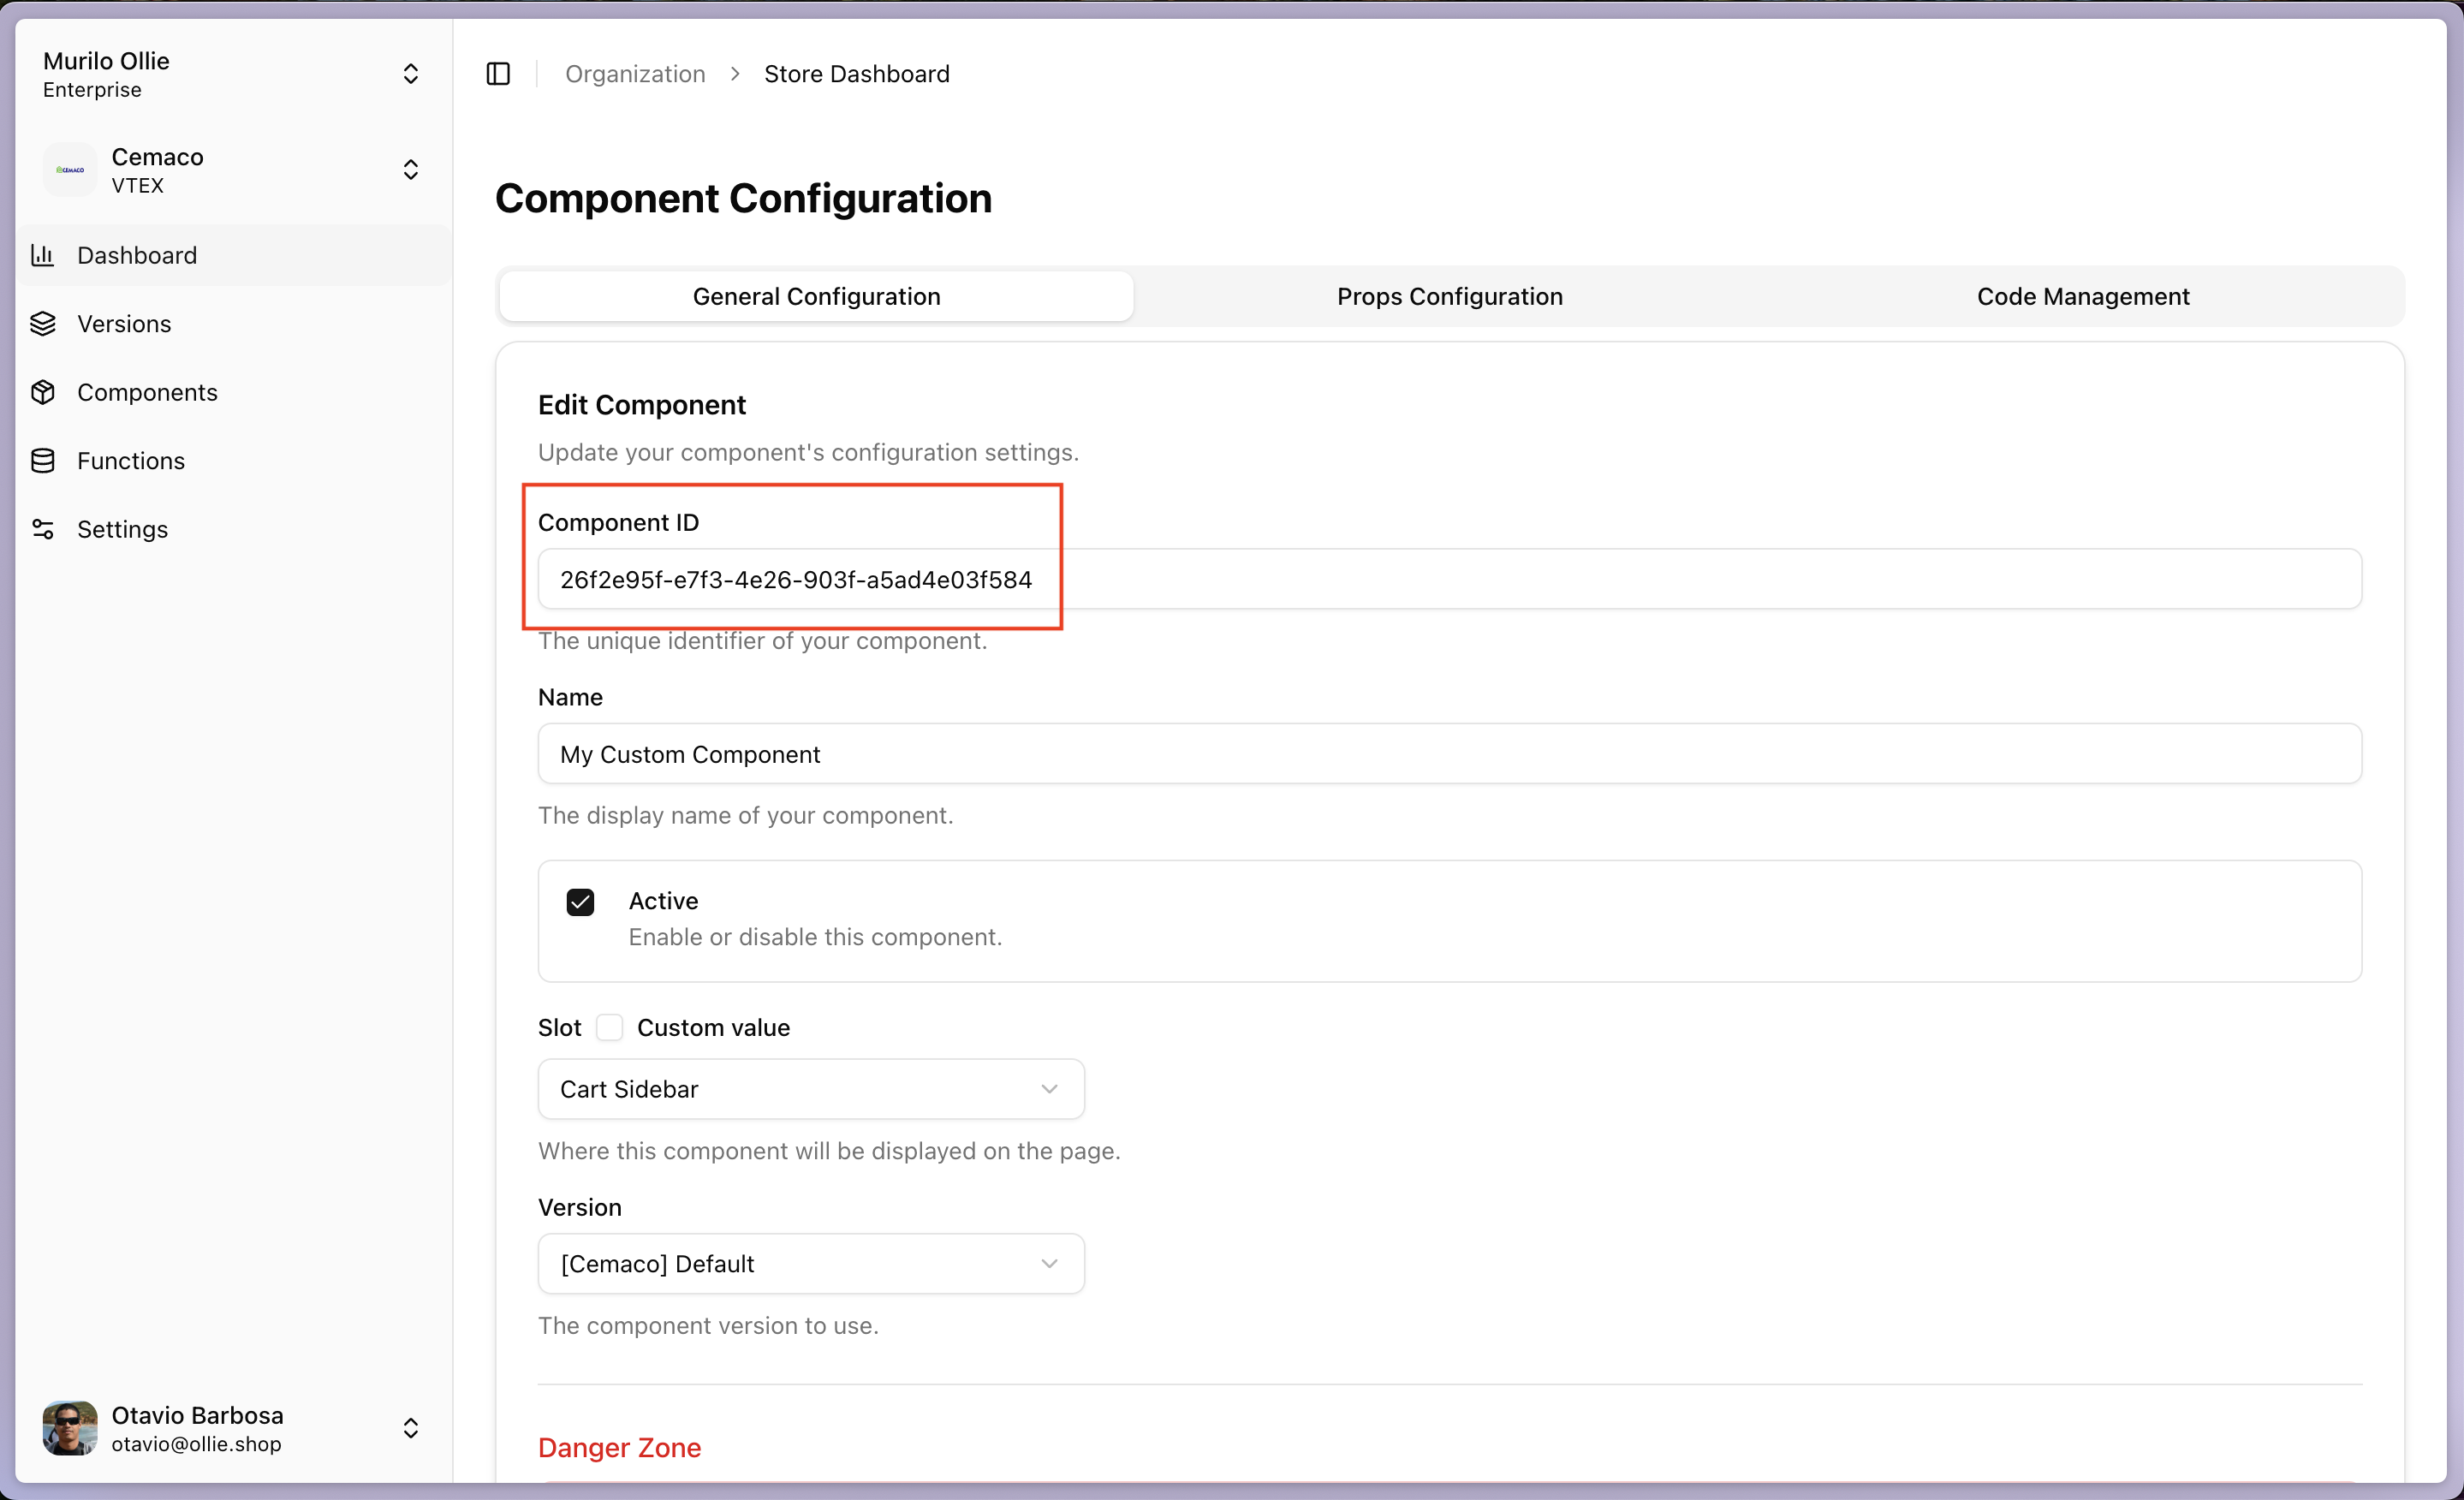
After creation, you'll see the Component Configuration page.
**Copy the Component ID** - you'll need this for deployment!
Example: `26f2e95f-e7f3-4e26-903f-a5ad4e03f584`
## Step 5: Preview Locally with Studio
Run the dev server and preview your component live in the checkout.
In your VS Code terminal, start the Ollie CLI dev server (hot reload):
```bash theme={"system"}
ollieshop start
```
This serves your components on `http://localhost:4000` and watches for changes.
In the admin dashboard, go to **Studio**. With the dev server running, your
component appears in the **Components** tab and renders live in the checkout
preview. Editing your code hot-reloads the preview automatically.
From Step 4, keep the Component ID handy — you'll use it to deploy:
`26f2e95f-e7f3-4e26-903f-a5ad4e03f584`
## Step 6: Deploy with Studio
With the dev server running (Step 5) and your component visible in Studio, deploy it without leaving the dashboard.
In **Studio**, find your component in the **Components** tab. Make sure the
**CLI** status dot is green (the dev server is connected) and the build has
no errors.
Click the **upload icon** on your component's card. Confirm in the dialog —
Studio bundles your component, uploads it, and shows the build status.
Studio polls the build and notifies you when it's done.
Visit your store's checkout to see your component live!
Prefer the command line? The CLI is documented separately under [CLI Reference](/ollie-shop/cli/installation).
You've successfully created and deployed your first Ollie Shop component! Your custom checkout enhancement is now live.